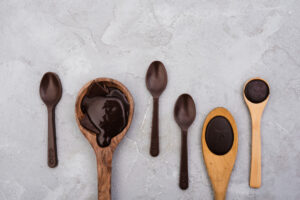

Tempering chocolate is one of the most important skills in the world of confectionery. It is the process of heating and cooling chocolate to stabilize the cocoa butter crystals so the finished product has a smooth texture, glossy finish, and satisfying snap. Without proper tempering, chocolate can look dull, feel soft, and develop white streaks known as bloom. Whether you’re a home baker or an aspiring chocolatier, mastering this technique will transform the quality of your chocolate creations.
This guide will walk you through step-by-step techniques professionals use so you can temper chocolate like an expert.
Understanding Why Tempering Matters
Chocolate contains cocoa butter, a fat that can crystallize in several different forms. Only one crystal structure—called Form V—creates the ideal texture and shine. Tempering ensures that the chocolate forms this stable structure, giving you:
- A glossy appearance
- Smooth texture
- Firm snap when broken
- Resistance to melting at room temperature
Without tempering, melted chocolate will set unevenly, resulting in a grainy or dull finish.
Preparing Before You Start
Before tempering, it’s important to prepare your workspace and tools. Professionals always stress that chocolate is sensitive to temperature and moisture.
Essential Tools:
- Heatproof bowl
- Double boiler or microwave
- Spatula
- Digital thermometer
- Marble slab (optional for tabling method)
Important Tips:
- Always keep utensils dry—water can seize chocolate instantly.
- Chop chocolate into small, even pieces for uniform melting.
- Work in a cool room to prevent overheating.
Once your setup is ready, you can begin learning the three primary tempering techniques used by professional chocolatiers.
Method 1: The Seeding Method (Most Beginner-Friendly)
This is the most popular and easiest method used in both home kitchens and professional settings.
Step-by-Step Process:
- Melt the Chocolate
Heat two-thirds of your chopped chocolate using a double boiler or microwave until it reaches about 45–50°C for dark chocolate (lower for milk and white chocolate). - Add Seed Chocolate
Remove from heat and add the remaining one-third finely chopped chocolate. Stir continuously to melt it slowly. - Cool to Working Temperature
Stir until the chocolate cools to around 31–32°C for dark chocolate. - Test the Temper
Spread a small amount on parchment paper. If it sets within 3–5 minutes with a shiny finish, it is properly tempered.
This technique is widely recommended in chocolate making for beginners because it is simple and reliable.
Method 2: The Tabling Method (Professional Technique)
This is the traditional method used in professional chocolate kitchens. It requires a marble slab and good temperature control.
Step-by-Step Process:
- Melt Chocolate
Heat chocolate to its melting temperature. - Pour onto Marble Surface
Pour about two-thirds onto a cool marble slab. - Spread and Scrape
Use a spatula to spread and move the chocolate continuously until it thickens and cools. - Return to Bowl
Mix cooled chocolate back into the warm melted chocolate. - Stir and Check Temperature
Adjust until it reaches the correct working temperature.
This technique is considered one of the most precise tempering chocolate methods and is preferred by professionals who need to temper large quantities quickly.
Method 3: Silk Tempering Method
This modern technique uses specially crystallized cocoa butter to quickly stabilize chocolate.
Step-by-Step Process:
- Melt Chocolate Completely
Heat chocolate until fully melted. - Add Silk Cocoa Butter
Add about 1% silk cocoa butter to the melted chocolate. - Stir and Maintain Temperature
Stir gently while keeping chocolate at working temperature. - Ready to Use
The chocolate will quickly form stable crystals and be ready for molding or dipping.
Many professionals prefer this method because using cocoa butter for tempering chocolate saves time and ensures consistent results.
Common Tempering Mistakes to Avoid
Even experienced chocolatiers can face challenges during tempering. Here are some common mistakes:
Overheating Chocolate
Excessive heat destroys stable crystals and requires starting over.
Moisture Contamination
Even a drop of water can cause chocolate to seize and become unusable.
Incorrect Temperature Control
Working outside the ideal temperature range prevents proper crystallization.
Insufficient Stirring
Chocolate must be stirred continuously to distribute crystals evenly.
Avoiding these mistakes will greatly improve your tempering success.
How to Maintain Temper While Working
Tempered chocolate must stay within its working temperature range. Professionals use these techniques:
- Place bowl over warm water briefly if it cools too much.
- Use a heating pad under the bowl.
- Stir frequently to maintain crystal stability.
Maintaining proper temperature ensures your chocolate remains smooth and workable.
Testing Properly Tempered Chocolate
There are a few quick tests used by professionals:
- Paper Test: Chocolate sets quickly and shines.
- Knife Test: A dipped knife becomes firm within minutes.
- Touch Test: Surface feels dry, not sticky.
These tests confirm that your tempering process was successful.
Final Thoughts
Learning to temper chocolate is a game-changing skill for anyone passionate about confectionery. While it may seem technical at first, practice and patience make it easier over time. Whether you choose the seeding method, tabling technique, or silk tempering approach, each method helps you achieve the same goal—stable cocoa butter crystals that create beautiful, professional-quality chocolate.
With the right tools, attention to temperature, and consistent practice, you can confidently temper chocolate like a professional chocolatier and elevate your homemade creations to a truly expert level.