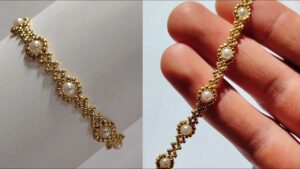

Making beaded bracelets is a fun and easy craft that anyone can learn. You don’t need to be an artist or have expensive tools. All you need are some beads, string, and a little patience.
Whether you want to make bracelets for yourself, as gifts, or even to sell, this guide will show you how to do it step by step. We will keep everything simple, so even complete beginners can follow along.
Why Make Your Own Beaded Bracelets?
Making your own bracelets has many benefits. Here are a few reasons why people love this craft:
- It’s relaxing. Many people find beading calming and enjoy it as a way to relax after a busy day.
- It’s affordable. You can make many bracelets for less money than buying them from a store.
- It’s creative. You can design your own colors, patterns, and styles.
- It makes a great gift. Handmade bracelets feel personal and thoughtful.
- It’s a fun hobby for all ages. Kids, teens, and adults can all enjoy making beaded bracelets.
What You Need to Make Beaded Bracelets
Before you start, gather these simple supplies:
- Beads: You can use glass beads, plastic beads, wooden beads, or gemstone beads. Choose colors and sizes you like.
- String or cord: Elastic cord, nylon thread, or beading wire all work well for bracelets.
- Scissors: For cutting the string or cord.
- Clasps (optional): If you’re not using elastic cord, you may want a clasp to open and close the bracelet.
- Measuring tape or ruler: To measure your wrist size.
- Bead board (optional): This helps you lay out your design before stringing the beads.
You can find most of these supplies at craft stores or online shops.
Step-by-Step Guide: How to Make a Beaded Bracelet
Now let’s go through the process step by step.
Step 1: Measure Your Wrist
Use a measuring tape or a piece of string to measure around your wrist. Add about half an inch to one inch for comfort. This will be the length of your bracelet.
Step 2: Cut Your String or Cord
Cut a piece of elastic cord or beading wire a few inches longer than your wrist measurement. This extra length gives you room to tie knots or attach a clasp later.
Step 3: Plan Your Design
Before stringing the beads, lay them out in the pattern you want. You can use a bead board or simply place them on a flat surface. This step helps you see how the colors and sizes look together before you commit to the design.
Step 4: String the Beads
Start threading the beads onto your cord one by one, following your planned pattern. Take your time and make sure each bead sits properly on the string.
Step 5: Check the Fit
Once you’ve added all your beads, wrap the bracelet around your wrist to check the fit. It should be snug but not too tight.
Step 6: Finish the Bracelet
If you’re using elastic cord, tie a secure double knot to close the bracelet. Add a small drop of clear glue on the knot for extra strength, then trim any extra string.
If you’re using a clasp, attach one end of the clasp to each side of the cord using jump rings or crimp beads, following your clasp’s instructions.
Step 7: Let It Dry (If Using Glue)
If you added glue to the knot, let the bracelet sit for a few hours to fully dry before wearing it.
Your beaded bracelet is now ready to wear or gift.
Simple Beaded Bracelet Ideas for Beginners
If you’re not sure where to start, here are some easy bracelet ideas:
- Single-color bracelet: Use one color of beads for a simple, elegant look.
- Pattern bracelet: Alternate two or three colors in a repeating pattern.
- Birthstone bracelet: Use beads that match your birth month for a personal touch.
- Charm bracelet: Add a small charm in the middle of your beaded design.
- Ombre bracelet: Use beads that go from light to dark shades of the same color.
Tips for Making Beautiful Beaded Bracelets
Here are some helpful tips to make your bracelets look even better:
- Use good quality string. Cheap string can break easily, so invest in strong elastic cord or beading wire.
- Mix bead sizes. Combining small and large beads adds interest to your design.
- Balance your colors. Try to spread colors evenly instead of grouping them all on one side.
- Double up on elastic cord. For extra durability, use two strands of elastic cord instead of one.
- Practice knot tying. A strong knot keeps your bracelet from falling apart, so practice tying secure double knots.
Common Mistakes to Avoid
Even simple crafts can have small mistakes. Here’s what to watch out for:
- Using cord that’s too thin: This can snap easily, especially with heavier beads.
- Not measuring your wrist first: This can lead to a bracelet that’s too tight or too loose.
- Skipping the knot check: Always double-check your knot is tight before cutting the extra string.
- Overcrowding the design: Too many colors or bead sizes can make the bracelet look messy instead of stylish.
How to Care for Your Beaded Bracelet
To keep your handmade bracelet looking nice for a long time:
- Avoid wearing it in water, especially if it has a glued knot.
- Store it in a small pouch or box when not in use.
- Keep it away from harsh chemicals like perfume or lotion.
- Check the knot or clasp regularly to make sure it’s still secure.
Frequently Asked Questions
Do I need special tools to make beaded bracelets? No. You only need basic supplies like beads, string, and scissors. Special tools like crimping pliers are helpful but not required for beginners.
What is the best string for beaded bracelets? Elastic cord is the easiest option for beginners because it stretches over your hand and doesn’t need a clasp. Beading wire or nylon thread works well if you want a more secure, non-stretchy design.
How long does it take to make a beaded bracelet? Most simple beaded bracelets take between 15 and 30 minutes to make, depending on the design and number of beads.
Can kids make beaded bracelets? Yes! Beaded bracelets are a great craft for kids, especially with larger beads and elastic cord, which are easy and safe to use.
Final Thoughts
Making beaded bracelets is a simple, fun, and affordable craft that anyone can learn. With just a few supplies and some patience, you can create beautiful bracelets for yourself, your friends, or even to sell.
Start with an easy design, practice your knot tying, and don’t be afraid to experiment with colors and patterns. Before you know it, you’ll be making beautiful, handmade bracelets with confidence.